Friday 1 February 2013

J35Oe Draken Austrian Airforce

Hello!

A new year and new builds! First off the work bench is the J35Oe Draken from the Austrian Airforce.
I really liked this build, but then again, I really like the Draken.....I think it´s the third Draken I have published  on my modelling blog

On with some photos! Enjoy!!!


Thanks for looking in! Comments are more than welcome!

Sunday 16 December 2012

Hello!


Well...time flies, but here is a new update on the A32A Lansen!

I moved along with the build and built the Maestro Models PE airbrakes and also made the holes for them in the fuselage. As there is just holes in this area, I decided to scratch build some interior to the airbrake bays to leven it up a bit.

Just click on the pictures to view them in bigger size.

Maestro Models PE Airbrakes.

Tools for the hole making in the fuselage.


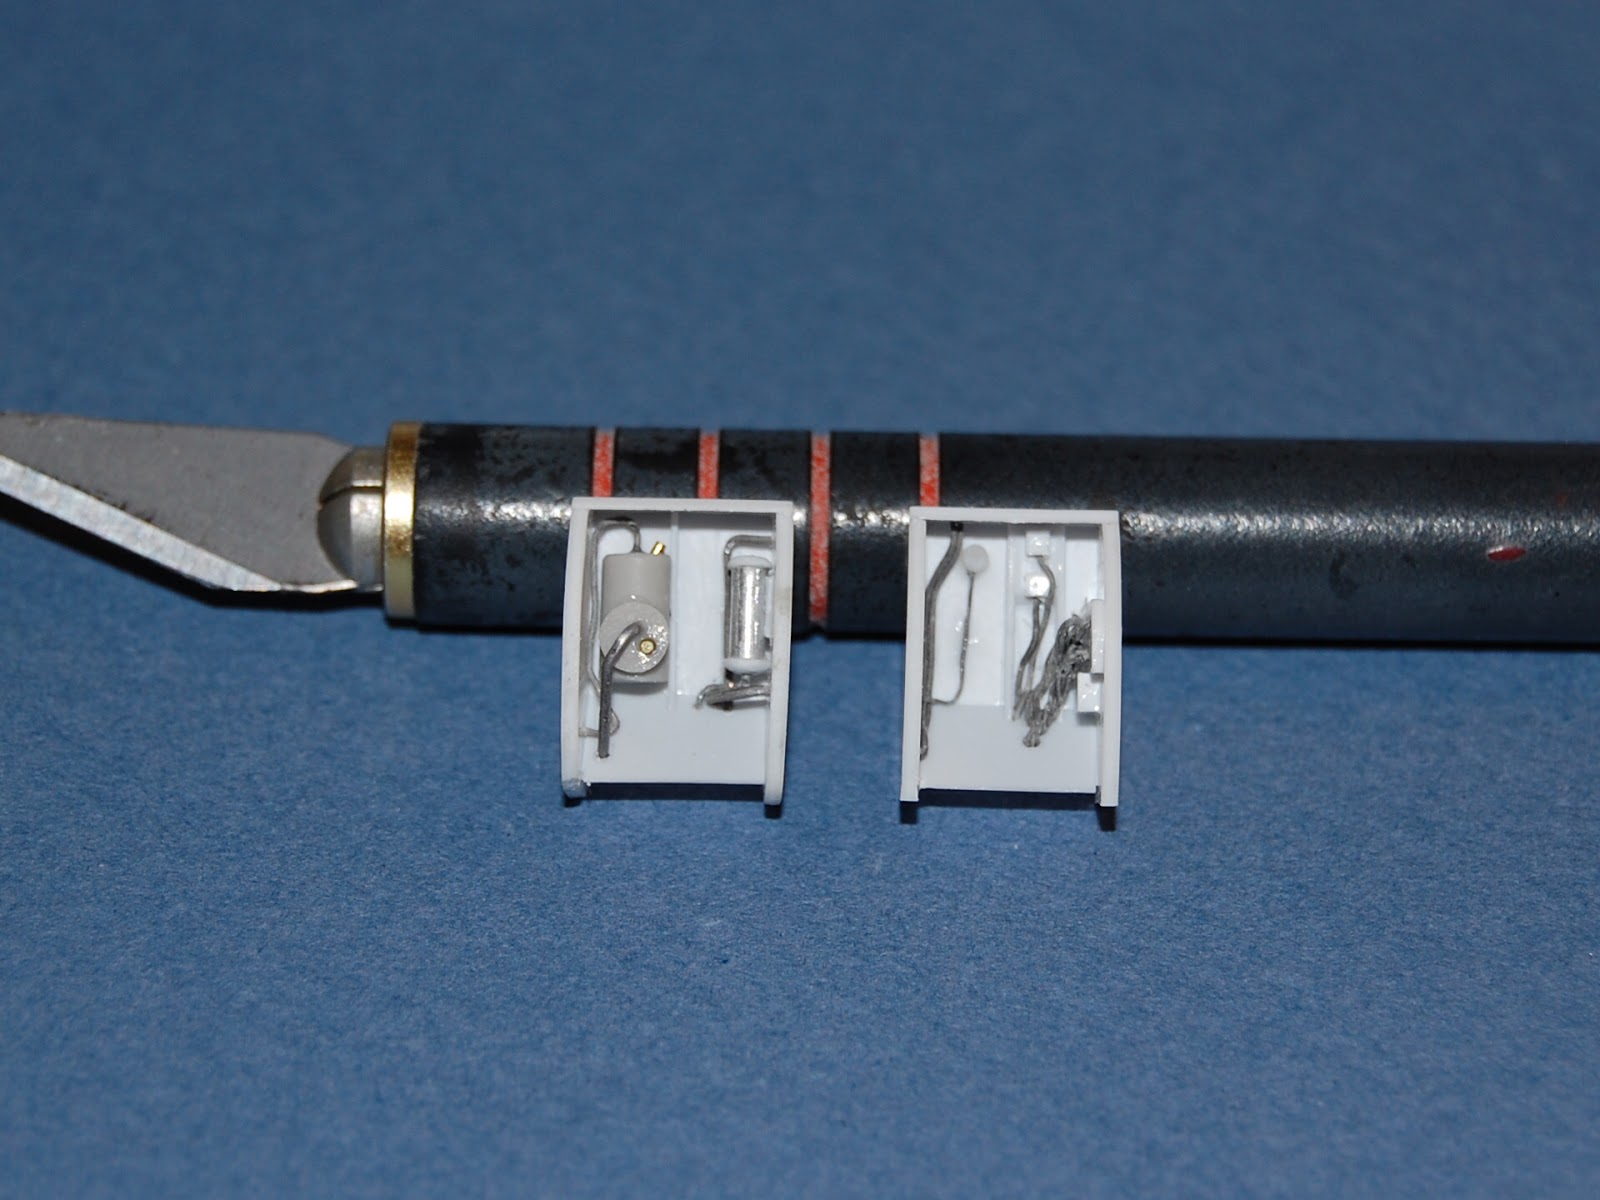
I started to build the lower airbrake bays followed by the upper ones. I have used styrene sheets, lead wire and brass rods.

Lower airbrake with the PE airbrake in place so we can see that it has enough room.

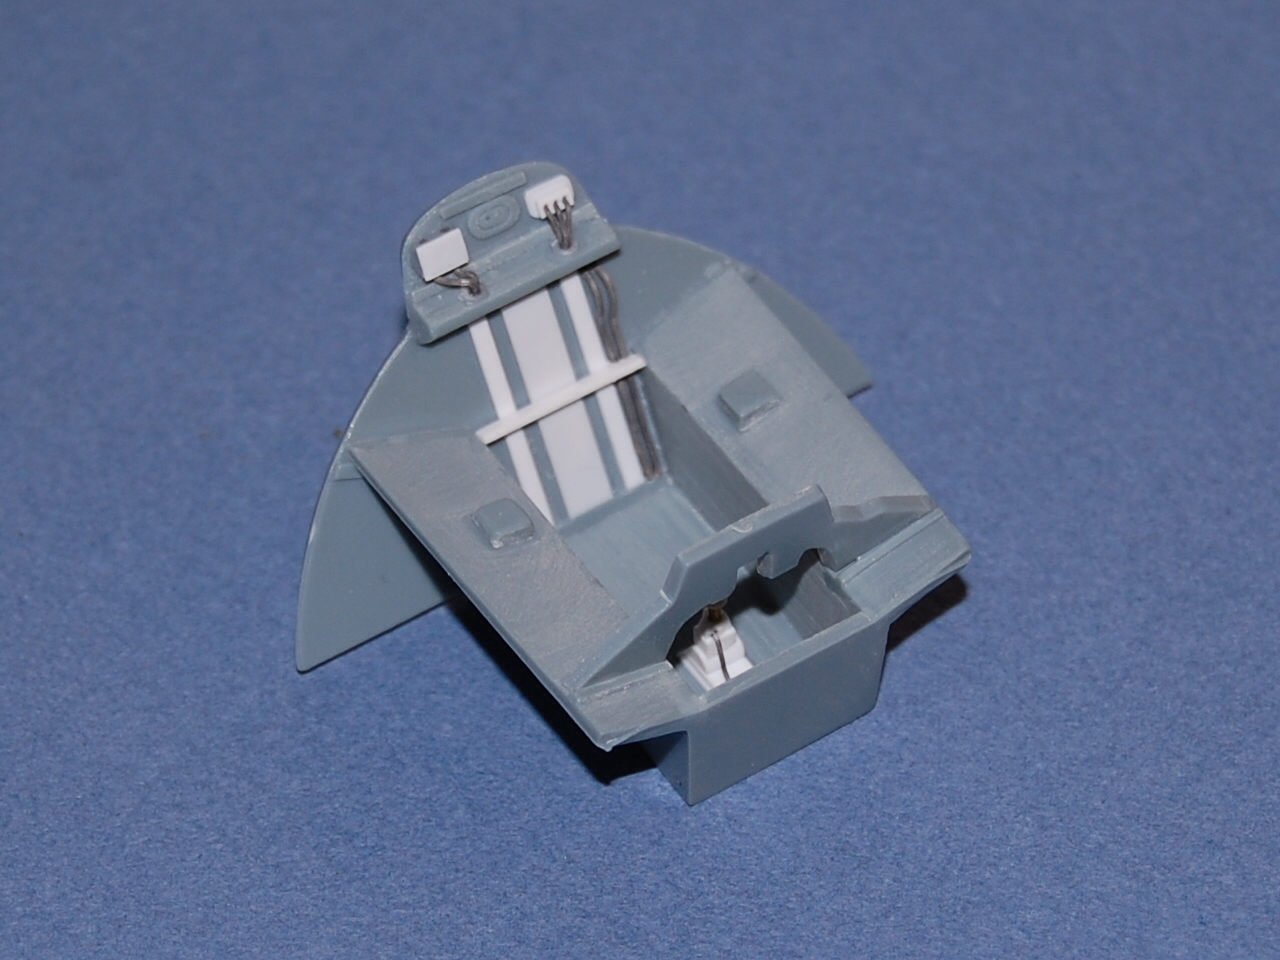
I moved along with the creation of the upper airbrake bays. I have used my own photos as well as the well known "artistic licence" to make the bays.


So, here are the upper airbrake bays painted prior to the installation in the fuselage.


Ok, I did a temporarily installment of the PE airbrakes too get a good look on how it will look. I looks quite nice and I think the PE airbrakes ads a lot of detail to the Lansen. In fact the airbrakes where almost always deployed when the Lansen was parked on the ground.


I also decided to add some detail into the main wheelbay as this is a very busy place on the real thing. I just added some of the wires and hoses. 

I have used styrene, lead wires and brass rods for this work.

The styrene parts are in place.


Lead wires and brass parts also in place all there is left to do is to get some paint on at a later stage.


Thanks for watching and hope you enjoyed it so far!

Tuesday 17 July 2012

Tarangus A32A Lansen superbuild!

Hello!

Time for a new build update! I have started to work on Tarangus A32A Lansen, a really great kit of a cold war warrior within the Swedish airforce. I have wanted to start and build this kit for some time now, but I wanted to take it a little bit further...with a lot of scratch building. All scratch building is done with the help photos, books, the internet, but also by using some free handed artistic licence and therefor everything may not be accurate. This build is also on the go over at Flory Models.

I have been doing scratch building in the nose wheelbay, cockpit and on the intakes so far.


I started with the nose wheelbay as this is a part of the cockpit assembly. Here is how the scratched detail came out, there are still some part for the gear door mechanism still to come, but I need to get the fuselage together first so that will have to wait until later.


I continued to work in cockpit and do some further scratch built detailing and make it work with Maestro Models Interior PE set. The work started to scratch build new columns for the navigator and pilot, to replace the ones from the kit.


The cockpit. I wanted more detail in cockpit, but also get both cockpit tubs together as one unit to make it easier to work with later on during the build.


As a part of the work to add detail in cockpit, I decided to spruce up the cockpit sidewalls with some scratch building.


I also did some scratch building to get some interior for the air outlet above the main air intake. There is just a hole into the fuselage in this area. I will not use the interior parts of the intake as I´m going to use the excellent PE FOD covers from Maestro Models.

First, the work to get the FOD covers into shape.


Here are the scratch built interior of the air outlet.


So, time to sum up this update. Cockpit and cockpit sidewalls are painted and weathered ready for the next phase in this build.

The painted and finished cockpit sidewalls.


The finished cockpit painted and ready together with the interior PE set from Maestro Models.


Finally some photos with the cockpit center part together with the cockpit sidewalls.


Thanks for looking in! I hope you like it so far?! I´m currently working on the airbrakes, again great stuff from Maestro Models. There will be scratch built "airbrake bays", as new empty holes occur when the fuselage is opened up to make room for the PE airbrakes.

Back another day! Cheers!!!